


 Two hot pads I made for a special order.
 The finished apron, but I am still working on the oven mitt, and hot pad for this set.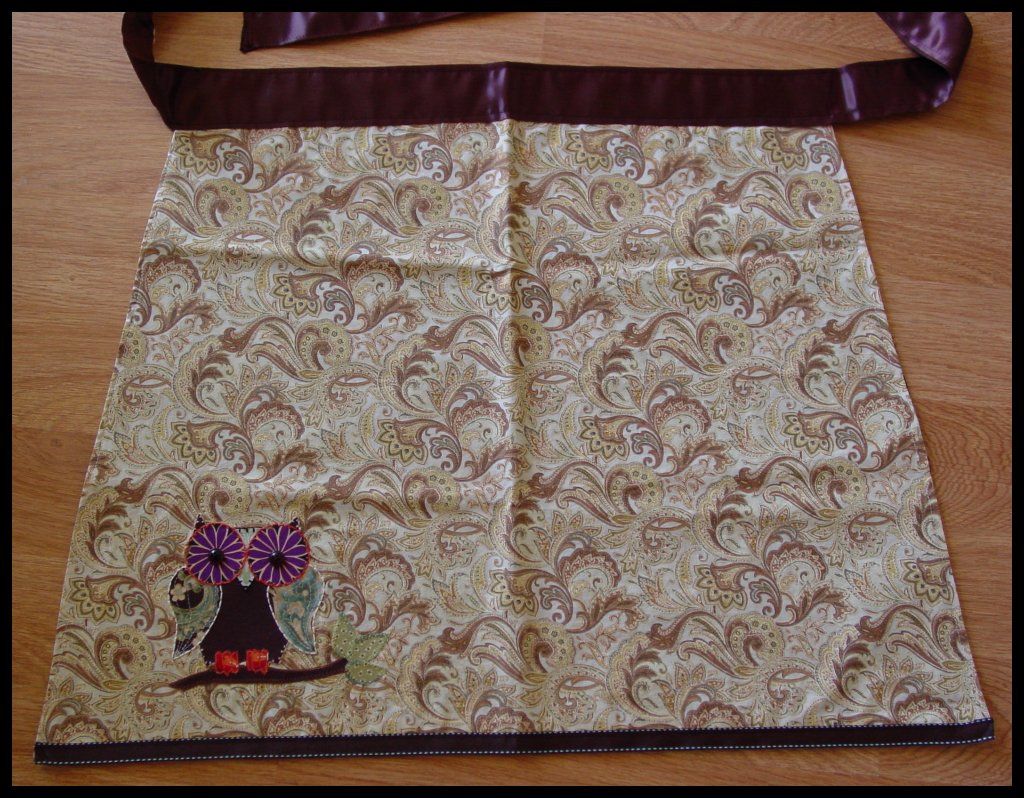
 Two hot pads I made for a special order. The finished apron, but I am still working on the oven mitt, and hot pad for this set.

 When I thought about how I wanted to paint each one, I wanted them to have a somewhat distressed look. So I thinned out my paints and used them more like glazes and layered them up, so there would be more dimension to them. I also used a dry brush technique, to give each one more of an antique look. Using a paint pen is helpful in making small lines, or dots for eyes. And finally sealing them up with a varnish for protection is the final step.

 I used a glossy varnish for the red bird, and a satin varnish for the others. I couldn't decide which varnish I like best. Also the birds have the Styrofoam underneath, and all the others have the wooden, which makes them a bit heavier.


 The fox is by far my favorite! I think he has tons of personality, and he looks cute at every angle. I basically started him out as I would for the owls, but added the arms, legs, nose, and tail.


 I finally finished my art dolls. I had to stop to make a wedding cake, and after the holiday weekend was able to catch up. They were mostly done except for the clothes. When I paint their bodies, I usually pick out the fabric of their dresses so I can paint the top to match. I like to have a general idea of how they will look from the beginning, but art for me is always progressive. Things evolve and change as I go, to what I think looks best for the piece.


 These dolls are meant to be looked at. They are not meant for toys, so I added a loop onto the backs of the dolls so they can be hung up for display. They can sit fairly well on their own, as their arms and legs are movable.


 This standing doll has a base, and she finally got her arms that were missing. I also added a pink design on her dress for more depth. (For details on how I made my art dolls- see my march 10th and 21st posts.)
 These two pictures are of the dolls hanging on the wall. (click on any picture to see a larger version)

 Over the weekend I made a wedding cake for a friend of mine. Her colors were ivory, blush pink, and charcoal grey. The cake was white cake with a chocolate ganache' filling and then covered with fondant. I actually had to dye the fondant an ivory color so it wouldn't be a true white. To get ivory I used pink and yellow food coloring-in very small amounts. The pale pink was a light rose color dye and the charcoal grey was the trickiest to make. I started out with a brown color, then added teal, then black and added more white fondant or frosting to get the exact color (if you just add black, it looks too purple- unless you add a ton of it to get black.) It was definitely tricky to get the colors right, so playing around with the colors a day or two before is a good idea- instead of stressing out while your making the cake.
  I found these darling pink pearls to add to the flowers, instead of using white which wouldn't necessarily match the ivory color. When making a cake, I usually let it lead me as to what it needs. I start off with a basic idea and sketch it out into my cake sketch book, but always have an open mind knowing things and ideas can change as you go. For example I added a lot more filigree to this cake when originally I didn't plan on it.
 Lastly, when I delivered the cake they had these gorgeous flowers for me to use as a cake topper and where ever else I wanted. When looking at the cake, I felt it didn't need any extra flowers on it, so I just decided to make a full cake topper. I think it turned out beautiful.
 I am in love with this doll. First of all, I'm in the middle of making three other dolls, but they have legs, and will be wearing clothes. But this doll is my first attempt at making a mermaid. I loved that I actually painted on her scales, instead of using fabric. She is made from muslin fabric, that is sewn and stuffed with poly fill, then painted with acrylics. (For details about my painted art dolls- see my March 10th, and 21st posts.)

 In making my art dolls this time around, I decided to make the arms out of polymer clay. The fabric ones just didn't seem right, and by using the clay I could sculpt them exactly how I wanted. I also used some paint art pens for the little details on her seashell bra. A coat of UV satin varnish seals her up and protects her from damage.

 I made her scales with varying shades of blues, greens, greys, and teals. I wanted her mermaid body to have a variegated effect, so I layered each of her scales with a different color, shading the colors differently down to her fins. Using a round tip brush- it was easy to get the scallop effect, making small downward brush strokes worked perfectly.
 She will be going on my Etsy site soon, incase anyone is interested.


 Posts
All Comments
Posts
All Comments


