My recent passion has been learning to applique'. I am in love with it! It is so much fun, and can be really calming when you get into it. So I knew that I wanted to make an apron, and I had found this really adorable half apron at Anthropology that I couldn't resist buying. The pattern was simple, a basic "rectangle" of fabric with a folded over waist band and apron ties. I had tons of fabric in my craft room so I didn't need to go out and buy a whole bunch, I just needed a big enough piece for the actual apron, and a long enough piece to make the apron ties. A hot iron and my sewing machine was all I needed to create my apron, which was now my "canvass" for the applique'.
 I found this really great book on Applique' by Janet Pittman. Since I had never done any applique' before, I wanted a book that just covered the basics. I read through the whole thing before I went out to buy the supplies, that way I would know what I needed to get, and not waste any money on anything unnecessary. Sometimes it can be confusing when you are starting out a new project or idea, and going to the fabric store can be overwhelming with all the different choices. This book really helped me decide which applique' method was best for me, and for the project I wanted to do.
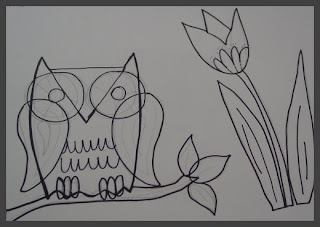
 I always make sketches of what I want to design. I knew I wanted a pocket and an owl and flowers. My sketches then turned into patterns that I traced and cut out on card stock white paper.
Using my patterns I appliqued my pieces on the apron using a paperback fusible web transfer method (which is basically an iron-on technique.) I used both hand and machine stitching to embellish the applique's. The machine stitching was a bit more unpredictable and harder, since I only have a basic sewing machine with a few different stitches. I like the look of the hand stitching better. I used a thicker embroidery thread so It would show up better.
 After the stitching was completed I then added buttons and a ribbon at the bottom for extra cuteness.
 The owl was the first thing that I appliqued. It took several tries to get it right, and it took some time to figure out the various stitches on my sewing machine. *Note* Keeping tabs on which stitches you used on what setting makes it easier when you want to use the same exact stitch again.
  My apron is completely machine washable, (which I think it needs to be) and my next applique' project is going to be matching oven mitts and pot holders. Yay! I'm really excited about my new art technique. As soon as I get the hang of it, I'm going to make a bunch more in different colors, patterns, and styles and then post them for sale in my Etsy shop. So keep an eye out for those in the future. But for now, this apron is mine to adore! (click on the pictures to see a larger version)


